A Guide to Virtual Events: YouTube Livestreams
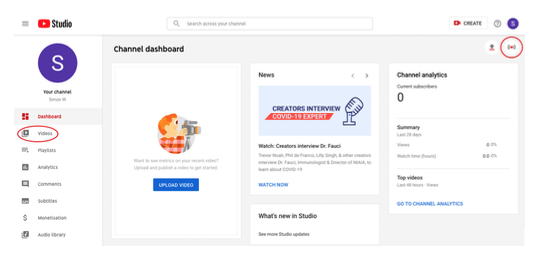
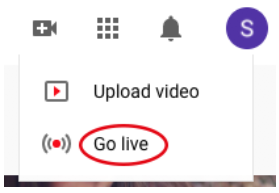
In part two of this series, we looked at how the popular video conferencing software, Zoom, could be best used as the platform for your virtual event.

While most of you will probably have direct experience of using Zoom, the true probably isn’t the case of YouTube livestreaming. Because of this, we’re going to go into slightly more detail this time on the intricacies of getting things set up.

Getting started

The first thing you’ll need to do is create a channel on YouTube. To do this, you’ll first need to create a Google account (if you don’t already have one).

  1. Go to youtube.com
  2. Click on the ‘SIGN IN’ button in the top-right corner:
  3. You’ll then see the Google log in. If you have a
    Google account, log in as normal here. If not, click
    ‘create account’ and complete the forms that follow. Please note: a Google account can be associated with any email address – it doesn’t need to be a Gmail account.
  4. Click on ‘your channel’ via the drop-down menu
    in the top-right corner:
  5. On your channel page, click the ‘YOUTUBE STUDIO’ button in the top-right corner
  6. This is where your videos will appear when you have uploaded them, and also where your recorded live streams will be visible. For now, click on the ‘Go Live’ button in the top-right corner:
  1. If this is your first time, YouTube may inform you that you need to wait 24 hours for your live streaming to be enabled – so make sure you have plenty of time when preparing!
  2. You will be asked to share your webcam and/or audio. Accept this.
  3. By default, YouTube will assume you want to start your live stream straight away, but we also have the option to schedule a future live stream.
  4. Give your live stream a name.
  5. The next drop-down allows you to choose if your live stream should be:
    1. Public: your live stream will be available to everyone
    2. Unlisted: still accessible to everyone, but only if they have a link to it
    3. Private: only visible to you
  6. Select ‘unlisted’
  7. Next is the option to schedule for later. For the purposes of this first test, let’s leave this deactivated.
  8. Next is a declaration YouTube asks you to complete to indicate whether the video is suitable for children for legal compliance purposes. If in doubt, say no.
  9. ‘More options’ allows you to select specific camera and mic (if you have more than one) and also to categorise the video. This is more for the purposes of people who are making their video open to a wide audience, so don’t worry about this too much.
  10. ‘Advanced settings’ lets you deactivate live chat during the stream, and also to indicate if your video is going to contain promotional material.
  11. Once you’re done, click the ‘NEXT’ button
  12. There will now be a short countdown and then a final confirmation before you go live. Next to the ‘GO LIVE’ button is a ‘SHARE’ button, which provides you with the link people will use to access your live stream, especially important if you’ve chosen to make the video ‘unlisted’. If you miss copying the link at this stage, you can find this later.
 

Once you’re live, you’ll see what’s being broadcast (i.e. you) in the main part of the screen (1). On the right (unless you disabled it) is the live chat window (2). Once people are on the live stream, they will be able to leave comments and questions here. As mentioned previously, they will need a Google account to be able to contribute to the live chat. You can add to the chat yourself via the box at the bottom of the live chat (3).

In the top-left corner of the screen you’ll see the following:

  1. How long you’ve been streaming for
  2. How many people are watching
  3. How many people have clicked the ‘like’ button

And at the bottom of the screen you’ll see:

    1. Your volume indicator so you can check your mic is working
    2. This lets you copy the link to the live stream and share it on social media
    3. Click this when you’re ready to end the live stream


Once you’ve had chance to familiarise yourself with the interface and how everything works, go ahead and end the stream. You’ll be presented with a summary of the live stream – number of views, new subscribers to your channel – and the option to either dismiss this or ‘edit in studio’.

Let’s dismiss for now and then click on the YouTube Studio logo top-left to return to the channel dashboard. The video you just made is displayed here. To delete it, click on ‘videos’ in the left-hand menu, and then select the ‘live’ tab.

This will display your video in list format. When you hover over it, you’ll have options to (from left to right below) edit the video, view analytics, view/edit comments and view it on YouTube). Click the three dots to reveal further options: get a shareable link (useful if you want to distribute the video after the event), download the video to your PC, or ‘delete forever’, which is what we’ll select now.

Also, to the left of these options, you’ll see a ‘public’ drop-down. This is where you can see the accessibility of the video, as we defined in step 11 above.

Planning your first YouTube Live Stream

Assuming all of the above went successfully, we’re now ready to go ahead and schedule our live streamed virtual event. The stages you go through are very similar to the ones above, so we’ll just review these in summary below:

  1. Log into YouTube
  2. Click on the camera icon and then choose ‘go live’:
  3. Give your stream a name, make it ‘public’ or ‘unlisted’ (depending on how restrictive you want to make access) and select ‘Schedule for later’.
  4. This will reveal scheduling options, where you can choose a date and time. Regardless of what you enter here, you can start the stream whenever you like. However, this date and time will be displayed on your YouTube channel along with a countdown.
  5. Specify if it’s child-friendly or not and (if you wish) give it a category via ‘more options’
  6. YouTube then lets you take a photo for the video’s thumbnail. You can replace this by uploading an image later if you choose.
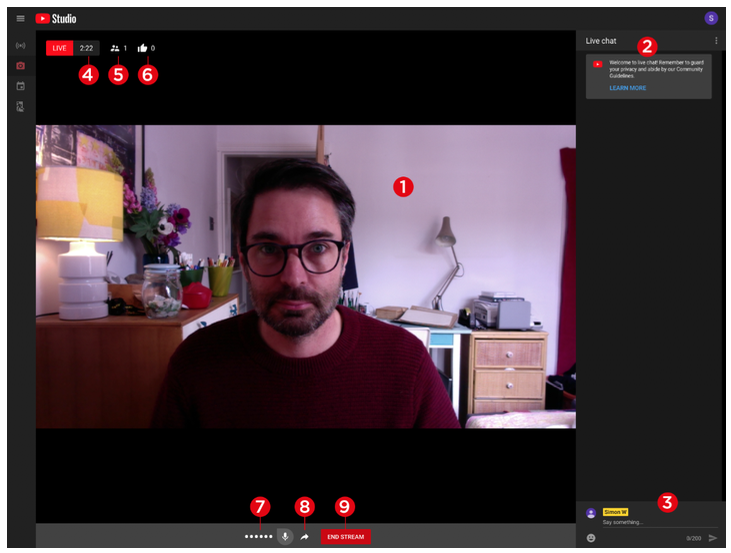
  7. Click on the ‘SHARE’ button and copy the link. You can now distribute this to your event attendees with instructions. Maybe explain that they don’t need any special software and that if they can access YouTube, they’ll be able to watch the event. You could also mention at this point that if they want to contribute via the live chat, they will need a Google account; that way have time to get that set up if that’s something they want to do. You could also say that you’ll be monitoring your email (or Facebook, etc) if they want to get in touch that way during the stream instead.
  8. Now click ‘DONE’ and you’ll see a list of scheduled events (presumably just one). If you wish, you can go ahead and schedule multiple streams in advance at this stage.
  9. When the date and time of the event arrive, just return to this page, click on your scheduled stream and hit ‘GO LIVE’.

Things to remember with YouTube Live Stream:

  • All people need to access your stream is the ‘shareable link’ – no passwords or logins
  • To join in with the live chat, however, they will need to have a Google account
  • There’s a delay of about 30-60 seconds between your broadcast and your audience, so bear this in mind when interacting with the live chat – don’t expect an immediate response!
  • The first time you stream, YouTube might take 24 hours to activate your account, so leave plenty of time to test this.


Our fourth and final part in this series is entitled ‘Taking Things to the Next Level’ and we’ll be looking at how you can build on the basics we’ve covered so far, and present a more professional event.

And if you’ve read today’s article on YouTube and thought to yourself, ‘that looks great, but I wish there was a way to share my PowerPoint,’ we have the answer!

James Watson
[email protected]
No Comments

Post A Comment